How to Make Money With Stock Photography in 2025: A Fun, Practical, and Ultra-Detailed Beginner's Guide
How to Make Money with Stock Photography in 2025: A Fun, Practical, and Ultra-Detailed Beginner’s Guide!
Introduction: Stock Photography Isn’t Dead—It’s Evolving
If you think stock photography is all awkward handshakes and fake smiles, think again. Today’s stock platforms want real people, natural light, and authentic stories.
The best part? You can start with just your smartphone.
In this guide, you’ll learn:
What stock photography is (and why it’s still relevant)
Where to sell your photos (and which sites pay best)
What kind of photos actually sell
How to shoot high-quality images—even as a beginner
How to upload, keyword, and market your work
Tips to scale your income over time
And yes—we’ll keep it fun. Because making money with your camera should feel good, not confusing.
Ready to turn your camera roll into cash? Let’s get started!
What Is Stock Photography and How Does It Work?
Stock photography refers to images that creators upload to online marketplaces for people to license and use for websites, ads, social media, packaging—you name it.
You, the photographer, upload a photo. A business, blogger, or designer buys a license to use it. You earn a royalty. (And sometimes that royalty keeps coming in for years.)
Sounds simple, right? It mostly is.
Here’s how the process works:
Take a photo – Use a DSLR, mirrorless camera, or even your phone.
Edit it – Enhance lighting, colors, and sharpness (but don’t go overboard).
Upload to stock websites – Like Shutterstock, Adobe Stock, or Alamy.
Add keywords and titles – So people can find your photo when they search.
Get paid when someone downloads your image – Cha-ching!
Stock photography is mostly passive income. Once uploaded, your photos can keep earning for years.
But not every photo gets downloaded. And not every site pays the same. So let’s talk about the best places to sell your work next.
Where to Sell Your Photos (and Which Sites Pay Best)
Not all stock photo sites are created equal. Some offer higher payouts, some are beginner-friendly, and others are more selective but worth the effort.
Here’s a breakdown of the top platforms and what you need to know about each:
1. Shutterstock
One of the biggest players in the game with millions of users.
Easy to get started, large buyer base.
Payouts: $0.10 to $2.85 per download depending on contributor level.
You earn more as you hit higher download tiers.
2. Adobe Stock
Integrated with Adobe Creative Cloud—designers are your buyers.
Higher royalty rate than most (starts at 33%).
You keep full rights and can upload elsewhere.
Great keywording tools.
3. Alamy
Known for higher payouts (you can earn up to 50%).
Accepts more editorial-style and niche content.
Slower volume than Shutterstock, but better per-sale revenue.
4. iStock by Getty Images
Two tiers: iStock and Getty (premium).
They offer exclusivity for higher royalties.
Harder to get in, but great for serious photographers.
5. Dreamstime
One of the oldest platforms.
Royalties range from 25% to 60%.
Friendly interface and active community.
6. Canva Contributors
Canva is exploding in popularity, and they accept photos, vectors, and videos.
Fast-growing market with creatives and entrepreneurs.
7. EyeEm
Connects to Getty and other premium distributors.
Mobile-first approach, good for lifestyle and Instagram-style photos.
8. Depositphotos, 123RF, and Bigstock
Lower traffic but still worth testing for variety.
May perform better for specific content niches.
Bonus: Your Own Website
Use tools like Pixieset, Zenfolio, or Shopify to sell directly.
You keep 100% of the revenue—but you do all the marketing.
Most pros upload to multiple platforms. Diversify for maximum exposure (and income!).
What Kind of Photos Actually Sell (And How to Shoot Them)
Let’s be honest—your cat’s 15 blurry selfies aren’t going to fund your vacation. If you want real downloads, you need to understand what stock buyers are actually searching for.
Popular Photo Categories That Sell:
Lifestyle & People
Diverse people doing everyday things (working, cooking, laughing, traveling)
Authentic, candid moments beat stiff poses every time
Family, fitness, friendship, food—all golden
Business & Technology
Remote work, coworking spaces, laptops, Zoom calls
Mobile apps, hands on keyboards, virtual teams
Health & Wellness
Mental health, fitness routines, meditation, yoga
Doctors, nurses, caregiving, healthy food prep
Education & Learning
Students studying, online courses, virtual classrooms
Nature & Travel
Landscapes, urban exploration, cultural elements
Unique perspectives from places you visit
Holidays & Celebrations
Birthdays, weddings, Christmas, Halloween
Remember: Upload months ahead of the holiday season
Still Life & Flat Lays
Styled desk setups, food arrangements, product mockups
Trendy Topics
Sustainability, inclusivity, remote work, AI, NFTs
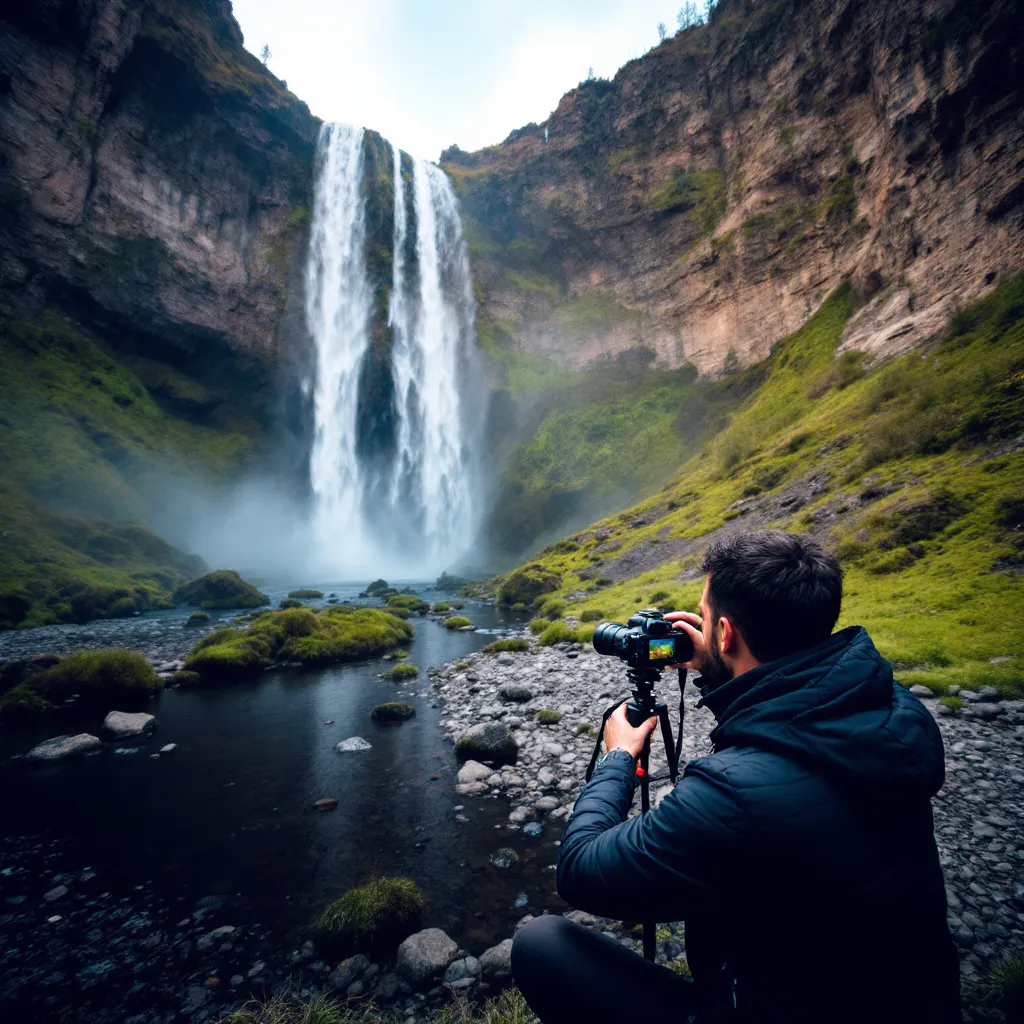
How to Shoot Stock Photos (Even as a Beginner)
You don’t need a photography degree—just some planning and practice.
Step 1: Use What You’ve Got
Smartphone cameras (iPhone 12+, Pixel, Galaxy) are totally fine
Natural light is your best friend
Clean backgrounds or intentional settings make a big difference
Step 2: Shoot in Landscape & Portrait Modes
Some buyers need horizontal images for banners; others need verticals for mobile use. Cover both!
Step 3: Use Props and Plan Scenes
Think ahead—if you’re shooting “work-from-home,” gather a laptop, notebook, coffee mug, plant, and maybe a dog.
Step 4: Keep It Real (and Diverse!)
Use real people, real body types, and natural expressions
Represent different ages, ethnicities, and abilities
Step 5: Shoot With Copy Space
Leave room in your photo for text—on walls, empty sky, desktops, etc. Buyers love flexible images they can use for ads.
Step 6: Always Shoot in High Resolution
Use the highest quality settings your device allows. Most platforms require 4MP or higher.
Step 7: Edit Lightly
Use Lightroom, Snapseed, or VSCO to adjust brightness and contrast
Avoid heavy filters—buyers want natural, clean edits
Uploading Your Photos and Keywording Like a Pro
Uploading your stock photos is more than just clicking “submit.” If you want people to actually find—and buy—your images, you need to understand how to optimize your uploads.
Step 1: Sign Up for Contributor Accounts
Each stock site requires its own contributor registration. Be ready to:
Upload a government-issued ID
Agree to their contributor terms
Wait 1–3 days for approval (depending on platform)
Step 2: Prepare Your Files
Use JPEGs in the highest resolution possible (but under each site’s max file size—usually 25MB)
Save with clean, simple file names (e.g., "woman-working-laptop.jpg")
Keep an organized folder structure on your device for fast access
Step 3: Add Titles That Are Clear and Descriptive
Avoid artsy or vague titles like "Dreamscape" or "Freedom." Use literal descriptions like:
"Young woman using laptop on sofa at home"
"Healthy breakfast with fruit and granola"
Titles help search engines index your images—so make them useful.
Step 4: Master Keywording (This Is Crucial!)
Most stock photo platforms let you add 10–50 keywords per image. These tags determine whether your photo gets seen.
Good keywording = more visibility = more downloads = more $$$.
Use:
Who: adult, teenager, man, woman, family, senior
What: computer, yoga mat, salad, cat, coffee
Where: park, office, kitchen, bedroom, beach
Style: candid, aerial, close-up, flat lay, night
Mood: happy, focused, cozy, professional
Pro tip: Use keywording tools from Adobe Stock or Shutterstock’s Keyword Tool to borrow tags from similar bestsellers.
Step 5: Submit and Wait for Approval
Most platforms review images manually. It can take anywhere from a few hours to several days. Rejected images usually come with feedback (blurred, poorly lit, missing release, etc.).
Step 6: Track Performance and Tweak Over Time
Once approved, monitor your downloads. Which keywords perform best? Which topics get more hits? Let your data guide your next photo shoot.
Scaling Your Portfolio and Growing Your Income
The more quality content you upload, the better your chances of making consistent income from stock photography. But scaling isn’t just about volume—it’s about strategy.
Step 1: Upload Consistently
Make a weekly or monthly goal (e.g., 20–50 new images)
Batch shoot multiple themes in one session
Keep your content seasonal, relevant, and evergreen
Step 2: Diversify Your Content Types
Add videos: Even simple 10–20 second clips of people working, walking, cooking, or typing are in demand
Explore illustrations, vectors, or mockups if you have design skills
Step 3: Build Series and Collections
Stock buyers love consistency. Create image sets or themes (e.g., "Remote Work Lifestyle," "Healthy Breakfasts," or "Family Fun at Home")
Grouped images get used in presentations, websites, and social posts
Step 4: Respond to Trends and Market Needs
Use tools like Google Trends, Shutterstock Contributor Dashboard, and EyeEm Missions to spot rising themes
Examples: AI, climate change, digital nomads, sustainability, hybrid work culture
Step 5: Expand to Multiple Platforms
Don’t rely on just one site. Upload to at least 3–5 stock platforms to reach a wider buyer base
Use tools like Wirestock to submit once and distribute everywhere
Step 6: Collaborate and Learn
Join stock photography forums, Facebook groups, and Reddit communities
Collaborate with models, makeup artists, and local businesses for unique photo shoots
Watch tutorials on keywording, editing, and content planning
Step 7: Reinvest in Better Gear (As You Grow)
Your phone is a great start, but over time consider investing in:
A DSLR or mirrorless camera
A fast prime lens (like 50mm f/1.8)
Basic lighting gear (natural light reflectors, LED panels)
Tripod and backdrop setup for still life or flat lays
Small upgrades can dramatically improve your work—and your earnings.
Common Mistakes New Contributors Make (And How to Avoid Them)
Starting out in stock photography can feel like walking a tightrope with a camera in one hand and a dream in the other. But don’t worry—we’re about to put a safety net underneath you.
Here are the most common missteps beginners make and how you can sidestep them:
1. Uploading Low-Quality Images
Blurry, underexposed, or over-edited images get rejected or ignored.
Fix it: Use good lighting, shoot in focus, and avoid heavy filters.
2. Ignoring the Legal Side
Photos of people or private property without a signed model/property release can’t be sold commercially.
Fix it: Always get releases when needed. Most stock sites offer downloadable forms.
3. Poor Keywording and Titles
Without accurate keywords, your images won’t show up in search results.
Fix it: Use relevant, specific, and searchable tags. Think like a buyer.
4. Not Uploading Enough Content
One photo won’t make you rich. Neither will ten.
Fix it: Commit to uploading regularly. Build a portfolio with hundreds of diverse, high-quality images.
5. Using Unnatural Poses and Stiff Setups
Buyers want authenticity—not awkward smiles and handshake stock clichés.
Fix it: Capture candid, relatable, real-life scenes with genuine emotion.
6. Quitting Too Soon
Stock photography takes time to gain momentum.
Fix it: Stay consistent, track what works, and keep learning.
Avoiding these pitfalls won’t guarantee overnight success, but it will dramatically increase your odds of becoming a successful stock photographer.
Final Thoughts: Why Stock Photography Is Still a Brilliant Side Hustle
Let’s get real—stock photography won’t make you rich overnight. But with consistency, creativity, and strategy, it can:
Create real passive income
Open doors to freelance or full-time photography
Help you improve your skills with every shot
Let you earn while doing something you already love
Whether you’re a smartphone shutterbug, a hobbyist with a DSLR, or someone who’s never submitted a photo before, the barrier to entry has never been lower.
Stay Motivated:
Celebrate your first acceptance, first sale, and first milestone
Join communities of stock contributors for support and ideas
Keep learning from your analytics and improving each upload
What to Expect:
Your first few months may feel slow—but that’s normal
You’ll face rejections—everyone does (even pros!)
Your portfolio is an asset that grows and pays you over time
Your Action Plan:
Pick 3 stock sites and sign up as a contributor
Plan and shoot 10-20 high-quality, useful images this week
Upload, keyword, and track performance
Rinse, repeat, and scale!
With the right mindset and a little hustle, stock photography can be an incredibly rewarding way to earn online, grow creatively, and build a digital asset that keeps paying you.
Grab your camera. Your next photo could be your first payday.
Now go click your way to cash!
